Sunday, January 18, 2015

Spaghetti Carbona- Allergen Free

 This is one of my all-time favorite meals. I always requested it for my birthday dinner growing up. Now that we are on an allergen free diet, I have avoided it.  Not because we can't use gluten free pasta, but I just wasn't sure of using the dairy free cheese.  But I have gotten used to eating it in small amounts.  My mom avoids pretty much all carbs and sugar.  She had tried my favorite recipe using spaghetti squash and she and my dad devoured it.  I HATE squash, meaning even the thought of it gags me! When we were out visiting my parents at Christmas, she had put spaghetti squash in her soup- I tried it.  Not too bad!  I cooked some in with an Asian noodle mix I made the other day- couldn't really tell it was in there.  So we decided to try the ultimate test using the remainder of the squash!  The results were quite surprisingly tasty!  The baby ate 3 heaps.  The oldest ate a good sized toddler serving.  My husband ate it, saying if he hadn't known that it was squash in it, he wouldn't have suspected.  The middle son doesn't count;)  He doesn't eat much for noodles to begin with, and prefers mostly bland food, so not surprisingly he said he didn't like it!  Our whole pot of it was gone by the end of dinner though!  The following is the recipe I used.  The original recipe calls for mushrooms and onions.  I didn't add those because I was trying to get the boys to eat it!

Ingredients:
3/4 of spaghetti squash
1/2 pound bacon
1/2 c. chopped green pepper
1/8 c Earth Balance non-dairy, soy free butter
1/8 c. Chedder Daiya cheese
 3 egg yolks beaten

Step 1. Cook spaghetti squash in microwave by slicing 1 side and placing sliced side down in 1/4 c water and microwave for 7 minutes. While it is cooking, cook bacon so it is crispy. When done, break into small pieces. When squash is done, slice open and remove seeds.  Use a fork to pull out the 'spaghetti.'
Step 2. Saute green pepper (and if you choose to, onions and mushrooms)
Step 3. Place 'spaghetti' in pot and cook until soft and most of the moisture is out.  After cooked, melt butter in pot.
Step 4. Add bacon and peppers and toss well.
Step 5. Add cheese mixing well and allow to melt.
Step 6. Add pepper to taste.
Step 7. Add egg yolks and toss everything together.
Serve and ENJOY!

Wednesday, January 14, 2015

Allergen Free Ritz-type Cracker

When we switched our diet to allergen free, finding a good tasting cracker was hard.  Most of what we found in the stores either had soy or milk as an ingredient in the crackers, or tasted like cardboard.  Having young kids, crackers have been an easy, quick snack.  My middle really liked the Ritz crackers, so I tried to find a recipe.  There is 1 gluten-free recipe I could find, but dairy was still in the recipe.  The following I adapted from Gluten-Free on a Shoestring to also be dairy/soy free.  I have taken a lot of time to perfect this recipe.  While mine do not seem quite a flakey as the original recipe, this is a go-to snack for our boys, who are quick to choose these over any other cracker choices in our house.  They are often eaten very quickly.

UPDATE:  I tend to make a triple batch so it can last awhile.  The boys like these crackers for snacks.  I recently made my best batch yet, more light and flakey than what I typically get.  The ingredients below reflect what I use for a triple batch.  Made around 200 crackers!
 
Ingredients
 
9 Tbs cold, Earth Balance dairy free, soy free butter
3 Tbs Spectrum shortening
3 c.  Bob's Red Mill 1:1 Gluten Free baking mix
1 Tbs + 1 1/2 tsp baking powder
1 Tbs + 1 1/2 tsp sugar
1 1/2 teaspoon smoked paprika
3/4 teaspoon fine sea salt
3 Tbs olive oil
3/4  c. cold water
 
Step 1. Preheat the oven to 375 degrees. Line baking sheets with parchment paper.
 
Step 2. In a large bowl whisk together flour, baking powder, sugar, paprika, and salt.
 
Step 3. Add butter and shortening.  Mix with pastry cutter until the mixture resembles small pebbles. Add the vegetable oil and use pastry cutter until incorporated.
 
Step 4. Add the water stirring constantly.
 
Step 5. Divide into 4-5 sections and use an entire section before starting on the next.  Roll out on a floured pastry sheet to about 1/8" thickness. Use small cup or cookie cutter to cut into circles.  Use metal spatula to lift crackers off pastry sheet and place on baking sheet.  I don't leave any space between the crackers, as they do not spread.  Use fork to make an X on each cracker in the center.
 
Step 6. Bake 18-20 minutes until starting to brown.  If you can tap with your nail and it gives a little in the center (feels a little soft), bake for a few more minutes. 
 
Step 7. While baking, melt 2-3 Tbs butter in a bowl.  When crackers are done baking, brush with butter and sprinkle with salt.  Allow to cool on towel. ENJOY!!


Sunday, November 16, 2014

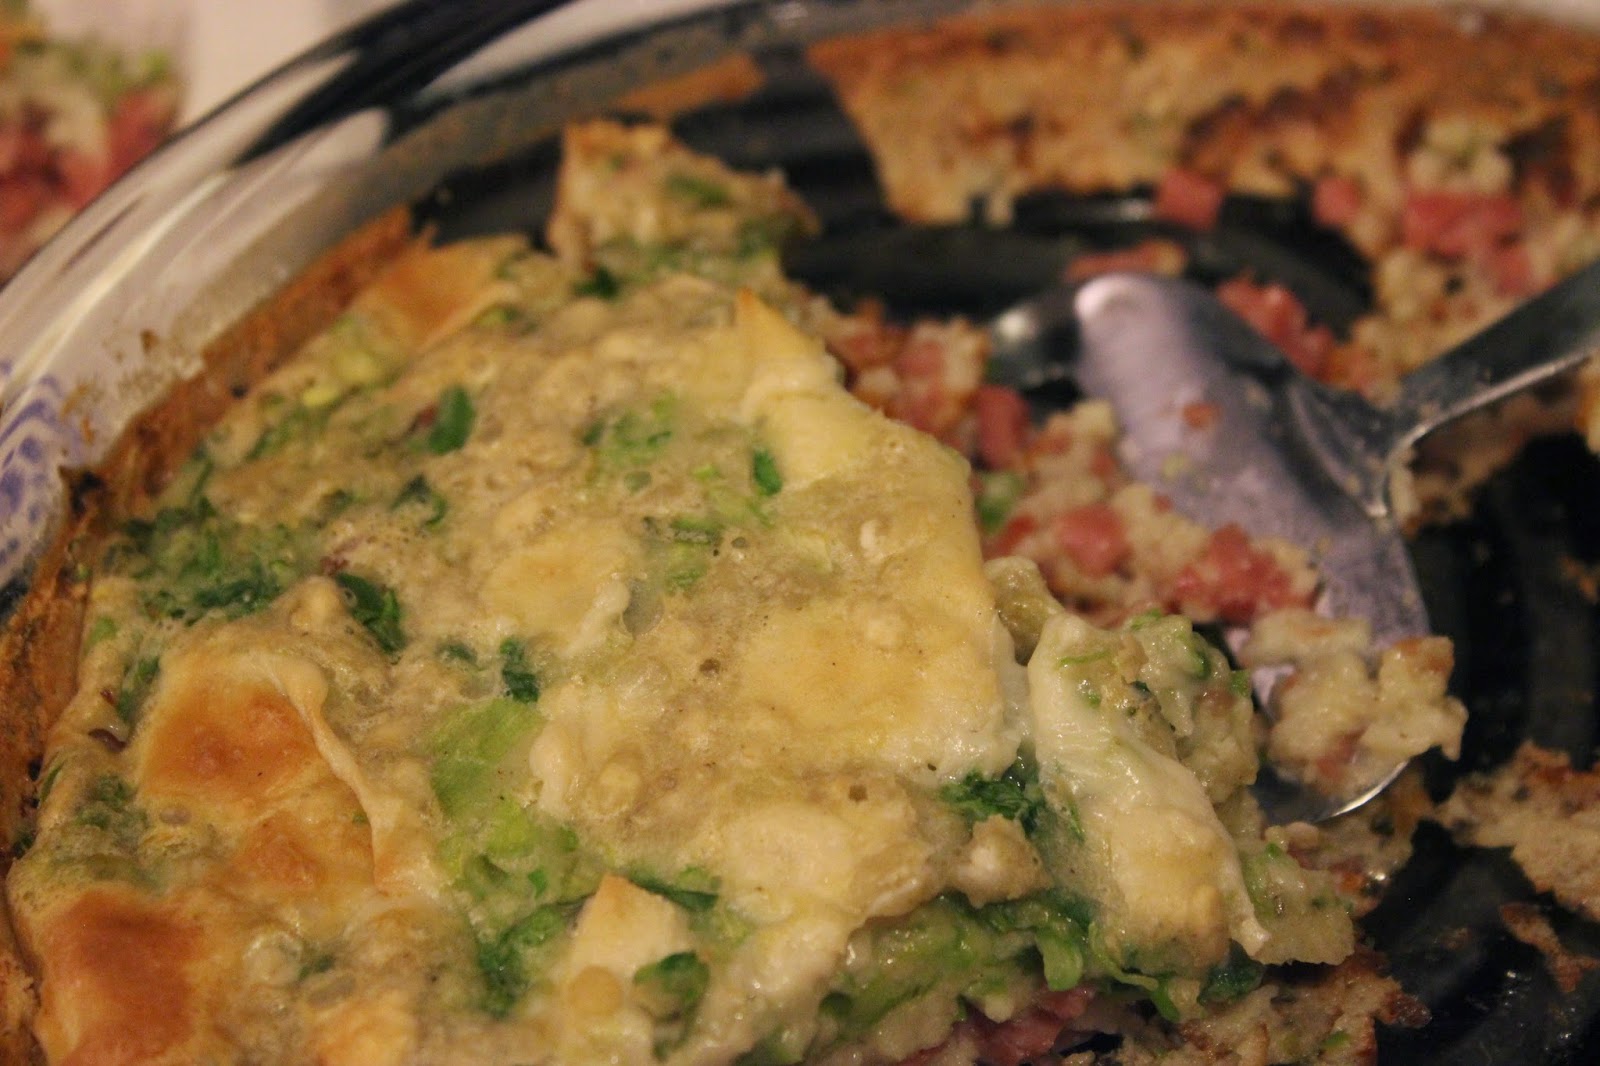
Dairy Free and Gluten Free Asparagus and Ham Quiche

Eggs... oh how we have missed eggs.  We have added eggs back into our diet on a sporadic basis.  Our middle son's belly didn't seem to take to eating them with breakfast on a daily basis.  But, my husband and I will enjoy them on occasion!  We used to like making a ham and asparagus quiche.  It was a yummy breakfast, and the leftovers were actually pretty tasty- and I don't particularly like leftovers.  But now that we have diet changes, I had to find a way to modify my original recipe.  The result was pretty tasty, and pretty close to the original, dairy and wheat version!

Ingredients:
1 bunch asparagus
3/4 pound cooked ham
1/2 c green onion
swiss slices Daiya cheese
6 eggs
2 c rice milk
1 1/2 c Bob's Red Mill 1 to 1 baking flour
1/2 tsp baking soda
1 tsp baking powder
1/2 tsp salt
1 tsp olive oil
1 Tbs Parsley flakes
1/2 tsp pepper

Step 1. Preheat oven to 375 degrees.  Grease 2, 9 in. pie plates.
Step 2. Chop asparagus, ham, and onion into small pieces (I use a food chopper).  Layer them into the bottom of each pie plate.  Crumble cheese slices on top.
Step 3. In bowl, beat eggs.  Add milk, flour, baking soda, baking powder, salt, oil, parsley, and pepper and mix well.  Pour over layered ingredients in pie plates. 
Step 4. Bake 45 minutes.  Allow to cool slightly then cut into slices. 
Step 5. Serve and ENJOY!  We like to add a little salsa on top!  Enjoy as leftover, as well!

Sunday, October 26, 2014

Allergen Free Pretzel Bites

I am always trying to find yummy snacks that the boys will eat, that also fit into our allergen free lifestyle.  They are always wanting things they can't have, so I wanted to find something different that would pique their interest.  One of our favorite treats at when we go to the mall is soft pretzels.  But that is not an option right now.  So I thought I would try to find a recipe for soft pretzels so we could try it, incase I really needed it for future! I found a pretty tasty recipe, that I tweaked for our needs.

Ingredients
1 c warm water
1 Tbs quick acting yeast
1 Tbs honey
3 1/2 c Bob's Red Mill 1:1 baking flour
1 tsp salt
1 tsp gluten-free baking powder
1/4 c oil
1/3 c warm water

    For Later...
10 cups water
1 1/2 tablespoons baking soda
Sea salt for sprinkling on top

Step 1. In a small bowl, add the 1 c of water, honey, and yeast.  Let sit for five minutes until it starts to bubble.

Step 2. Add flour, salt, and baking powder and whisk until blended.  And oil and yeast mixture. Mix until ball of dough forms.  Add 1/3 c water, then mix for 1 more minute to knead the dough.

Step 3.  Cover with plastic wrap and let rise at room temperature for 1 hour.

Step 4. Preheat the oven to 425 degrees F. Line a baking sheet with parchment paper. Set aside.

Step 5. Bring 10 cups of water and the baking soda to a rolling boil in large pot.

Step 6. Divide dough into 8 pieces. Roll out each piece of dough into a thick rope. Slice each rope into 1 1/2-inch pieces.

Step 7. Drop pretzel pieces into the boiling water and boil them for 30 seconds until they start to float.. Remove the pretzel pieces from the water using a slotted spoon, allow to drain, and place them on the baking sheets.

Step 8. Spray with olive oil and sprinkle with sea salt.

Step 9. Bake until dark golden brown in color, approximately 15-20 minutes.

Step 10. Serve and ENJOY- with dairy free nacho cheese!!


Sunday, October 19, 2014

Strawberry Cheesecake (Non Dairy, Gluten Free)

Today was my birthday! I ALWAYS have cheesecake for my birthday- it's my favorite!  But since we are on an allergen free diet, that kinda eliminates the option for cheesecake.  So I set out to make one that was non dairy and gluten free.  I make my own graham crackers, so the crust would be easy enough to replicate, but I didn't have any made- ARGGHHH!  So I had to come up with a better plan.  The result was pretty tasty!

Ingredients

Cheesecake
2 c cashews
1/2 c lemon juice
1/2 c honey
1/3 c coconut oil melted

Crust
2 1/2 c gluten free chocolate chex cereal
3 Tbs non-dairy butter, melted

Topping
2 C thawed strawberries
2 Tbs sugar

Step 1. Boil cashews in 5 c. water for 1 hour. In the meantime...
Step 2. Crush cereal.  Mix in melted butter and coat well.
Step 3. Spread into bottom of pie pan.  Bake at 375 degrees for 9 minutes. Remove and allow to cool.
Step 4. When cashews are done, rinse and place cashews in blender.  Add lemon juice, honey, and coconut oil to blender and blend on high until smooth and creamy.
Step 5. Pour over crust.  Place in fridge to allow to cool and set-up overnight. 
Step 6. Mash thawed strawberries and mix with sugar.  Spread over cheesecake.
Step 7. Serve and ENJOY!

Sunday, October 5, 2014

Bell Pepper Nachos (Dairy Free)

I am constantly trying to come up with ways to add more veggies into our diet- like many families, I'm sure!  Even if we do have good ways to do it, we are not very good about planning ahead to get them cooked.  When I was searching for recipes for nacho cheese, I skipped over a site that had bell pepper nachos.  Their recipe used regular cheese, so I didn't think much about it after that.  Then it dawned on me that I could make it my own way.  I never paid much attention to what was in it after seeing the cheese, but remember they looked a lot like traditional nachos, subbing the bell pepper for the chips. So here is my, rather tasty, bell pepper nachos!

Ingredients
mini bell peppers (enough to fill a baking sheet or whatever size baking pan will feed you/your family)
1 can traditional refried beans
chopped chicken
Dairy free nacho cheese
1 avocado

Step 1. Preheat over to 350 degrees. Cut heads off mini bell peppers, remove seeds, and cut in half length-wise.  Place on baking sheet.
Step 2. Using a butter knife, spread a thin layer of refried beans inside bell peppers.  Sprinkle chopped chicken on top of refried beans.
Step 3. Prepare Dairy free nacho cheese as directed.  Drizzle over 'nachos.'
Step 4. Place in over on bottom rack, and bake 7-8 minutes until bell peppers are hot, but still crunchy.
Step 5. Remove from oven and place on plate.  Cut small pieces of avocado and distribute over 'nachos.'
Step 6. ENJOY!!


Dairy Free Nacho Cheese

Fall.  It is one of my favorite  times of year.  The leaves changing color, the air becoming cooler, and football!  With football comes finger foods, and the best finger food is nachos!  Nachos has been one of our Sunday football lunches for as long as I can remember.  My dad and I would make our nachos and sit together watching whatever game was on. 

Since we are currently on an allergy free diet, traditional nachos is not something I am able to enjoy.  So I went on a mission to find a dairy free alternative.  I searched all sorts of sites, and even took to Pinterest- which is not something I do often!  I tried a couple recipes, one from cashews, but it just didn't quite satisfy my nacho cheese craving.  So I developed my own concoction.  The problem is that it has to be fast to make, because with 3 kids, I don't always have time sit and make a nacho cheese that takes an hour to make.  It also has to be something that my 9 month old, 2.5 year old, and 4 year old can all enjoy, along with a husband who is not fully compliant with our allergy free diet.  I hope you can enjoy this cheese as much as we do!

Servings:
This was enough to make 2 adult plates of nachos, 2 toddler plates, and a small amount to mix with chicken for the baby's lunch.

Ingredients

3 Daiya chedder slices
1/4 Daiya jack style block
3 rounded Tbs nutritional yeast
2 rounded Tbs mild salsa
splash of rice milk

Step 1. Place all ingredients in a microwave safe bowl.
Step 2. Microwave on high for 45 seconds.  Stir.
Step 3. Microwave another 30 seconds or until melted and all ingredients are combined.
Step 4. ENJOY!  Drizzle over chips, use for dipping, add chili for chili cheese, etc


Sunday, August 31, 2014

Gluten Free, Allergen Free Oreo Cookies

My 4 year old (can't believe he is that old now) is always asking to buy the Oreo-type cookies when we go looking for snacks that he can have.  Since he is currently on an allergen free diet, even the gluten free versions are not an option for him.  It is so hard to have to tell your child, yet again, that he cannot have another something sitting on the store shelves.  I have a great recipe for fig bars, one I am working on for Ritz-type crackers, and have now got a yummy recipe for Oreo cookies that are free of ingredients my son is not supposed to have! I can't lie- I wasn't able to finish making them before sneaking a cookie, or 2!!  I actually prefer these to any store-bought brand, which I find tastes like sweetened cardboard.

Dry Ingredients
1 1/4 cups GF flour blend- I like Bob's Red Mill GF 1 to 1 Baking Flour
1/2 cup Raw cocoa powder
1 teaspoon baking soda
1/2 teaspoon baking powder
1/4 teaspoon salt

Wet Ingredients
1/2 cup butter, room temperature- I used Earth Balance Soy free
3/4 c Organic Cane Sugar
1 Tbs Ground chia mixed with 3 Tbs warm water
1 teaspoon vanilla

Cream Filling
2 Tbs butter, room temperature
6 Tbs Spectrum brand shortening
2 cups powdered sugar
2 teaspoons vanilla extract

1. Preheat oven to 350 F.

2. In the bowl blend butter and sugar. Add in Chia/water and vanilla and blend.

3. In a separate bowl, whisk together dry ingredients.

4. Slowly add dry ingredients to wet and blend until fully combined.

5. Line a baking sheet with parchment paper. Roll rounded teaspoons of batter into balls with hands, and place onto parchment paper. Use the bottom of a glass/cup to flatten the dough to about 1/8-inch thickness. (I used my kids' plastic cup that had a slight edge on the bottom of the cup that made nice, contained circles, and also kept the thickness of each cookie about the same.

6. Bake 12 minutes.  Cool slightly, then remove from baking sheet and allow to completely cool.

7. Beat together butter, shortening, and vanilla until smooth. Gradually beat in powdered sugar on low speed.

8. Spread thick layer of filling onto 1 cookie. Place another cookie on top of the cream. Press lightly. Continue until all the cookies have been used.  (The great thing about making your own, is you can use as much, or as little filling as you like to make your cookies, make them different colors, or add different flavors)

9. ENJOY!!!

Sunday, August 3, 2014

Gluten free fig bars

My oldest son loves fig bars.  He would eat them a couple times a day- well more often if I would let him!  He was quite distraught when I told him we had to get rid of all the food that hurt his belly and his skin, and that he couldn't have his fig bars anymore.  We are on an allergen free diet, that makes finding snacks the boys like and will eat quite challenging.  So I searched for a fig bar recipe!  I of course lost the site I found the recipe on, so thank goodness I wrote the recipe down.  I altered the recipe to correspond to our current allergen free situation.  While they are not quite the same as the ones he loved, they taste really good and are a great snack.  I also found that these are a great simple snack for my 7 month old to practice with finger food and chewing.  It crumbles enough when given in small pieces so I don't have to worry about him choking, but allows him to practice chewing- which he loves to do! Hope you enjoy them as much as we do!

Ingredients

Fig filling
9 calimyrna figs
16 mission figs
1/2 c. Pomegranate juice
1/4 c.  Cranberry juice
1/4 c. Lemon juice

Soak figs in juices overnight.  After soaking, place in food processor and blend into a thick paste.


Dough ingredients
Wet
1/2 c. dairy free butter
1/2 c. brown sugar
1/2 c. organic cane sugar
1 Tbs Chia in 3 Tbs warm water
2 tsp vanilla
1 Tbs molasses
up to 1/4 c. water

Dry
1/2 tsp baking soda
1 1/2 c. white rice flour
1/2 c. tapioca starch
1/4 c. teff flour
1/4 c. millet flour
1/2 tsp xantham gum
1 tsp nutmeg

1. Mix all dry ingredients together. 
2. Melt butter.  Add sugars, and mix.  Add chia mixture, vanilla, and molasses and mix.
3. Add dry ingredients to wet and mix until blended.  Add up to 1/4 c. water.  Add small amounts of water at a time until you are able to squeeze the dough into balls.
4. Chill dough for 1 hour.
5. After chilled, preheat oven to 350 degrees.
6. Divide dough into thirds.  Roll 1 section to 1/2" thickness on parchment paper on 1 end of the parchment paper.
7. Spoon fig paste onto half of the rolled out dough.  Fold the other half over top of the fig using the parchment paper to help fold it over and avoid breaking. 
8. Repeat steps 6 and 7 placing the next section of dough in the middle of the parchment paper and the third section on the other end.
9. Pull parchment paper onto a baking sheet and bake approximately 20 minutes until firm and lightly browned.
10. Allow to cool slightly, then cut into sections.  A pizza cutter works well for this!
11. ENJOY while they are warm or store in an airtight container.  I've noticed they will get a little hard after the initial cooling.  Keep in the airtight container overnight and they will have softened nicely!

Sunday, July 20, 2014

Gluten Free Bread

With our change to an allergen free diet, finding a good bread replacement was a priority for me.  The boys liked to have toast for a bedtime snack.  All of the gluten free breads in the store tend to have eggs, and are very dense.  It feels so heavy in my belly, is dry, and a little on the hard side.  I also wanted a bread that could be made in the bread machine since I have no time to be sitting in the kitchen cooking for any length of time. 

Here is the best bread recipe that you would never know is gluten free if I hadn't told you!

Ingredients

DRY
3/4 c. potato starch
3/4 c. brown rice flour
1 c + 2 Tbs tapioca starch
2 tsp xanthan gum
2 tsp active dry yeast
1/2 tsp salt

WET
1 Tbs honey
2 Tbs chia seed soaked in 6 Tbs warm water
1 1/2 tsp olive oil
3/4 tsp apple cider vinegar
1 1/3 c warm rice milk

Step 1. Combine chia seed and water in a cup and allow to sit for 5 minutes
Step 2. Combine dry ingredients in medium bowl.  Whisk together.
Step 3. Warm milk in a bowl.  Add remaining wet ingredients in with the milk and stir.
Step 4. Pour the wet ingredients into the dry.  Stir until combined.
Step 5. Pour mixture into bread machine.  Set on Gluten Free, Dark setting. 
Step 6. When bread is done, remove from pan and allow to cool completely on side. Do not cut prior to cooling, as it will be too gooey!

* I love this bread toasted.  My husband likes to eat it warmed with Daiya cheese melted on it.  We have also grilled it to eat with dinner and my husband used that with his burger.  We have made grilled cheese sandwiches with it using Daiya cheese, and those were pretty yummy!  We have not tried it with regular sandwiches!


Friday, July 18, 2014

Allergen Free Family

It's hard to believe it has been over a year since I have posted anything on here!  Our lives have changed so much in that time.  We have since added a third, beautiful baby boy to our brood.  I thank God all the time that he is mellow and sleeps, because I don't know how we would have been able to handle another challenging baby!

Now that he is here and the other two are older, it seems we have even less time to get things done.  Between working full time and these busy boys, meal planning has become essential, although we still aren't very good at planning ahead.  I have also been trying to get us back on track with eating healthier foods.  We had resorted to quick meals that weren't as healthy as we would like. We have also discovered some, scratch that, MANY dietary issues with the 2 older boys, which has made eating a very challenging task in our home.  I have always had concerns about my oldest and his skin issues and the middle and his belly issues- hard belly, STINKY gas, and sporadic, raunchy poops.  After having some labwork done, it was discovered that both of them were having issues with dairy, wheat and gluten, eggs, coconut, soy, peanuts, and almonds.  That means no ice cream, yogurt, all of their snacks, peanut butter, eggs at breakfast, and our almond milk.  All of the things they love.

We also have a now 7 month old son.  He has been such a mellow baby from day 1.  Woke 1-2 times a night right from the get-go, pretty easy going, pretty easy to settle.  He began taking longer and longer to settle, and then went from waking once per night, to 3 or more times per night, and was very difficult to settle. He was becoming more and more gassy and seemed very uncomfortable.  After changing my diet, the baby settled... sporadic gassiness, settles better overall, but especially only wakes once per night and is back in his bed in 15 minutes!  I never really thought changing my diet like that would have such an effect on my milk.  He only has fruits, veggies, and rice, and "meltable" gluten free snacks to practice chewing!  From my experiences with the older boys, I will definitely be delaying introduction of gluten and dairy products until he is 2 and hopefully avoid some of the issues we've had with the older boys!

We have spent the last 5 weeks finding alternatives, but mostly telling them "I'm sorry, we can't eat that!"  That is the hardest part of this whole change, telling them they can't eat the foods they like, and getting them to understand that.  For the most part they have been very good about not having melt downs over it, but finding alternatives they like has proved quite challenging.  I find recipes, and while I usually enjoy them, the boys are not quite as flexible!

I plan to slowly share some of the allergen free  foods with you that meet the taste standards of our family.  I have allowed small sneaks of things with coconut since their reaction to that food was high, but I think the other foods they reacted to were more of the culprit. 

Thursday, March 21, 2013

Kale chips

I have been on a small mission the past couple months to change my eating habits, to eat more natural foods.  That means less processed and attempting to base some of what we eat on the  "Nourishing Traditions" way of eating.  I find it somewhat time consuming, particularly since I am a working mom with two very busy, on the go boys.  We are also a family who needs to include more veggies into our diet, as I'm sure many people do.  The trouble is, we are pretty picky about veggies.  I prefer raw, but i know they are much harder to digest, and we don't necessarily get all the nutrients as when they are cooked.  Many cooked veggies gag me- usually the texture, sometimes the taste.  In my pursuit of healthiness, an acquaintence mentionedIi really should be eating more leafy greens- cooked!  That's worse than most cooked vegetables!  The thoughht of that is just disgusting.  She also mentioned kale. Oh, i eat kale on my lunch wraps- I said.  Her reply, raw greens are really difficult to digest, so you should cook them.  Yeah, I know, just can't bring myself to do it!  So she mentioned kale chips.  Hmmm... Interesting idea.  How do I do that? You just mix them in olive oil and salt and bake them.  Even my 7 year old eats them, she says.  OK, if a 7 year old can do it, so can I.  I figured out how to do it, and guess what?? They are my new salty snack of choice!  In fact, I can't seem to keep them around for leftovers for lunches.

I have been trying to find a salty snack made without processed oils and sugars.  Not so easy to find. Who knew kale chips would satisfy that craving?!?  But, it got me thinking that someone must have been really desperate to think, hmmm let's bake some kale!  Here is the simple recipe for an addicting, yet healthy snack!

1 bunch kale
Approximately 1/4 c olive oil
Approximately 1 tsp sea salt, johnny's seasoning salt, etc

Step 1. Clean and dry kale.  Peel leafy part off the center stem on each side and tear leaves into 1 inch pieces, or so, and place in mixing bowl.

Step 2.  Pour olive oil over kale and mix until coated.

Step 3.  Sprinkle salt over kale and mix.  Add more or less to taste. (If they aren't quite salty enough, i lightly dust as soon as I take them out of the oven)

Step 4. Spread onto baking sheet so that the pieces do not overlap.

Step 5. Bake for 18-20 minutes in a 300 degree oven.

Sunday, January 20, 2013

Potty training time?

I was recently talking with a co-worker, and somehow we got onto the subject of potty training.  She was sharing how easy it was to potty train her boys, but her grandson took forever to learn.  She said that when he was around 5 it had dawned on her to find some training pants that were more like what she used when her boys were little, because then they could feel wet, unlike diapers today that wick away moisture.

I hadn't thought too much about trying to potty train yet, as my 2 1/2 year old doesn't show much interest, and doesn't really understand when he pees- unless he happens to watch himself doing it when his diaper is off.  So, i decided to try and find some cotten training pants and start trying.

At first my son was excited, just from the thought that he could earn stickers and cars (his absolute favorite).  I thought this might work, as he hates to have wet clothes, he loves cars, this could be great.  Well, it's not starting off so well, not that i thought it would be easy!  He's peed through 5 pairs of training pants so far, and the more he doesn't earn a car, the less he wants to sit on the potty.  The problem is, that i don't think he completely understands what it is to pee in his potty.  So, he will sit on it and make a "pssssssss" noise with his mouth, and in his mind he has gone potty! Hmmm... Good effort buddy, but that's not peeing in your potty. So now to get him to understand...  No, no, you need to get water in you potty, from your weenie!  Of, course he tries, but he's already peed, so nothing comes.  Hmmm...  This could take a while!

Sunday, January 6, 2013

Healthy Mission

During the past week, I was on a bit of a mission.  It started trying to look for ways to help our 2 year old sleep better.  The past few weeks his nose has been getting quite stuffy in the middle of the night , which is waking him  up 3-6 times a night.  He also has little red bumps all over his upper arms and thighs, and on his cheeks.  Exzema??  So I was trying to figure out if allergies could be the cause.  I had been doing some random reading on the internet a few weeks ago, and one site had recommended a book, " Gut and Psychology Syndrome" (or something with a title similar to that).  I had decided to try and get in on Kindle, but it is not available in that version.  Recommendations list associated with that book had a cookbook that followed the principles discussed.  But that too, was no available on Kindle.  I came across another book that seemed to discuss similar things.

I read this book in about 2-3 days (which I don't typically do).  It has inspired me to attempt to make our foods more natural and free from so many toxins, get back to the way people and cultures ate even as short a time ago as my grandparents, but even prior to that.  I want to get raw milk, have gotten raw honey, have already gotten the healthy chicken and made my own chicken stock, and have plans to make more chicken stock, beef stock, cream, butter, cream cheese, and possibly yoguurt.  The book was so interesting, and such a simple thought to step back and prepare things as they once were before processed foods and before our lives became so hurried.

I know it will take me awhile to get quicker at preparing these foods, and I will have to make the effort to really prepare these foods as we should.  I am lucky to have a husband who is game for trying my new ventures, but I am truly hoping to keep my family healthy and full of energy.  Here is to our healthy journey!

Wednesday, December 26, 2012

Something Scary

Oh, how life with a toddler and little one gets so much more fun every day.  Cael is learning to talk and say more and more.  He can carry on little conversations, and speaks in rather long sentences.  He is learning to do more and more- jump, catch, drive (wait-isn't that supposed to be at 16?!???).  Well, he got a great little car/4-wheeler for Christmas, and if how he drives now is any indication of how he will drive when he is 16, it will be an expensive few years!

Along with all these things, he is becoming more aware of his surroundings, a little hyper-aware.  Dark rooms, being outside when it is dark, and being alone in the dark are his short list of frightening things.  It officially became apparent the other night when he began crying when I left him in his room to read (part of our regular nightly routine for months).  I came into his room to see him crying and hiding his head under his pillow.  All he could tell me was there was "somthing scary" while looking toward a back wall.  He had already had a nightlight in his room.  So I added another, with no luck calming him down without me in there. I eventually had to lay in his bed with him to get him to fall asleep.  

I evoked ideas to help remedy the situation from friends on Facebook.  There were a few suggestions- all entailed using something to get rid of the monsters before we went to bed.  While the ideas were good, I didn't quite feel like that would solve the problem.  There was something that he could see that was scaring him- I think the shadows on the walls.  We proceeded to remove all things on the wall and any object that was not furniture or books.  Any of his shows he likes to watch that have a possible scary element to them, were deleted from the DVR.  There were still shadows on the wall, from the furniture and curtains, produced from the nightlight plugged in a couple feet off the floor.  So I got the idea to replace the current light switch for the room light with a dimmer, so that any shadows produced would be produced on the floor or out of his visual field from his bed.  

While his new fear of the dark is not completely remedied, I have been able to leave him in his room to let him read in bed before going to sleep.  He continues to ask me to lay on his floor while he falls asleep, but I wonder if it is more to have the company rather that because there is "something scary."  Let's hope we can continue to help him get over this new fear!

Saturday, October 6, 2012

The Adventures of Grocery Shopping

Grocery shopping used to be a time my husband and I could get out of the house, leisurely walk the aisles, think about what foods we needed/wanted, and gradually work our way through the store.  After we had Cael, our oldest son, that changed.  He was never a baby who would just sit in his carseat and sleep or hang out while we shopped.  We always had to carry him, facing the world, so he could see everything that was going on.  We tried carried him through the store for as long as he would let us.  He was also neve a kid that would just sit in the cart seats.  Eventually the time came and we had to start letting him walk the aisles with us.  That again has forever changed the way we shop.  We had to tag team.  One would man the cart, and the other would man the boy- try to keep him from getting into everything, but let him appease his curiosity.  He has always had a lot of energy, so he likes to quickly go from one area to another. 

Then came Cason, baby #2!  This has FOREVER changed our shopping trips!  Cason only briefly (the first few weeks of life) would sleep in his carseat while we shopped.  But he too likes to be able to see the world.  Now one person straps Cason to them in the carrier (best invention ever, especially when you have 2 kids and need free hands), and the other chases Cael around the store.  Typically we begin our adventure heading toward the balls in the toy area.  Cael can become very fixated on getting to play with the balls, so to make our trips more enjoyable for all, whoever has Cael for the shopping trip heads over to the toy section while the other does the shopping that needs to be done on the way over and then wanders the toy aisles for ideas for future gift.  Cael likes to toss a few balls and look at all the cars and trucks.  After 10 minutes or so, we give him a warning that his time is almost up, and then head on to the grocery sections.  We pass many benches, which he loves to climb on, so he may hang out on those for a few minutes before moving on to catch up (until the next bench).

Cael likes to look at everything, touch everything, help get everything, climb on everything, and help push the cart.  If he's not doing one, he's doing another, and then another, and then another, and then back to the original something- you get the idea!  Usually pushing the cart results in him belly on the floor holding onto the bottom bar of the cart, dragging himself on the ground.  We like to think of him as their mop! He tries to climb on empty shelves (there are a lot of them), climb in the fridge areas, climb on the freezers, etc.  We like to get him to help put items in the cart to slow him down for a moment.  He doesn't always listen when we tell him 'no,' and at times we will end up carrying him for a short time because he chose not to listen- which results in crying, whining, and wiggling any way he can to get out of our arms.  So, while Cael is busy doing all of that, whoever has Cason is in charge of manning the cart and quickly moving through the aisles to get our weekly groceries.  We have little time to discuss what we need/want, as stoppage time becomes time when Cael can find the only thing breakable in that aisle and go for it, apples, oranges, and cantelope are balls to throw, and bananas are something he wants to eat!

We know some people will look at us and think that our kid is out of control.  But we know this is a kid who needs to move.  That is how he learns, and that is how he gets out his energy.  He has always been on the go- from infancy when we would have to walk him in laps around the house to keep him settled, to when he clrawled only for a short time to discover new things, and when he learned to walk and hasn't stopped!!!  We know that it would be a horrible shopping trip if we tried to confine him to the cart or in our arms.  So this is our weekly workout chasing Cael while he explores our world.  So if you happen to see us out, know that our son is a happy, smart, and even well behaved kid for a 2 year old, who likes to move and explore the world!  Just remember that things aren't always what they seem!  Happy Shopping!

Sunday, September 23, 2012

Dairy-Free Key Lime Pie

Every other week we get our fruits and veggies from a local co-op.  This week we happened to get about a dozen limes.  What the heck do you do with that many limes?  We don't have a lot of time to prepare meals.  So I opted to try a key lime pie.  Our oldest son still has some stomach aches if he eats too much dairy, so I decided to try a non-dairy version.  And kinda made it up as I went.

Ingredients

1 cup cashews
1 cup Almond milk
1tsp vanilla
6 limes zested and juiced
1/4 tsp liquid stevia
2 Tbs maple syrup
Approximately 6 graham crackers and 8 vanilla wafers ground up to make 1 1/2 cups
1/4 cup non dairy butter melted
1 1/2 tsp agar flakes dissolved into 1/3 cup boiling water


Step 1.  Boil cashews in water for 45 minutes.

Step 2.  Preheat oven to 350 degrees. Combine the graham cracker/vanilla wafer mixture with the butter until moistened.  Spread into a pie pan and up the sides.  Bake 10 minutes.

Step 3.  While those cook, combine zest, lime juice, vanilla, and stevia into a bowl.

Step 4.  When cashews are done, strain the water and place cashews into a blender with almond milk.  Blend for 2 minutes until smooth.  Add maple syrup.  Add the lime juice mixture and blend until well combined.

Step 5.  Once blended and agar flakes have been dissolved, pour agar liquid into blender and blend for 2 minutes.  Pour mixture over crust.  Place in fridge and allow to set up until cold.


Serve and Enjoy!!

Wednesday, September 19, 2012

Dairy Free "Formula"

Having two kids, you really learn a lot about babies and toddlers, likes and dislikes, things that work, things that don't.  Unfortunately you also learn "on the job." We learned a lot after our first son.  Particularly we learned that the reason he was probably so crabby and not pooping regularly was because he has a sensitivity to dairy, the casein in it.  Unfortunately we didn't really consider this until he was 11 months old, and wouldn't need a formula anymore, so we never had much trial and error with that.  Now that our second is transitioning to formula we have noticed a change in his demeanor, and he is very gassy and may not poop for days at a time (VERY unlike him). So began our quest for a formula that he would like, that would give him the nutrients he needs, and make his belly feel better.  We have lately had him on Similac Alimentum.  He does ok on it.  He isn't as crabby as when he was on the non-hypoallergenic formulas, but he is still quite gassy and still not pooping.

I spent a lot of time the other night on the internet searching for options for homemade formulas.  There were some really interesting options to say the least.  One you make from liver and chicken broth.  I really can't bring myself to try something like that.  It just sounds disgusting!  I finally came across a woman's story where she was trying to find something to help her grandson, and with the help of a friend who gave her a book to read that had some formula recipes, she eventually used that as a guide to develop a formula in conjunction with consulting with many health experts, including nutritionists.

So, i've decided to give it a try. It can't hurt.  And if we can find a way to help him feel better and ultimately sleep better, that means we will get to sleep- What's that??  I modified the recipe to include things I have at home that seem to include what is called for in the original recipe.  I have diluted it for now to get him used to the flavor, as we still have a small supply of breast milk for a couple more weeks.  He took the first bottle of it pretty well, and i tasted it.  Actually doesn't taste too bad.

Here is the recipe I used for homemade formula
(This is my edited version based on the amount my son is currently eating for the day-actaully it is a little more than he eats for 1 day)

Ingredients
2 c. Goats milk
2 c. Almond milk
1 Tbs blackstrap molasses
1/2 tsp powdered children's acidophilus
3 Tbs flax seed oil
2 Tbs liquid coconut oil- not easy to find
2 tsp Dr's Advantage liquid calcium/magnesium+ mineral essentials
3 Tbs nutritional yeast
1/2 tsp infant vitamins

Add all ingredients into a blender.  Blend on high for 30 seconds.  I am filling a 4 oz bottle with 3 oz of formula and storing in the fridge and adding 2 oz warm water when I feed him.  He prefers warm milk, although will drink it cold.  I'm sure the formula is meant to be drunk without diluting it.  So as he gets used to the taste I will wean off the addition of water.  I will be sending a premade batch with him to daycare.  I plan to make a batch in the evenings for use the next day.

UPDATE: I am pouring the mixed batch of formula into 8 oz glass bottles and storing in the fridge.  For a 4 oz bottle, I add 3 oz of formula and 1 oz hot water to warm it up a little.  My son drinks this formula very well! He hasn't has any issues with a hurting belly and is very happy.  It was an immediate difference in his personality after he had been drinking this "formula" and not the store bought formulas.

There are a lot of ingredients, but I keep all his formula ingredients in 1 area in the kitchen and fridge and fridge to make the process quick. I make 1 batch at a time and last a day and maybe 1 bottle the next, depending on how hungry he is!  There is definitely a variation in quality of ingredients, so unfortuneately, the more expensive the ingredients (i.e. flax seed oil), the better for your child.  But I'm sure (and I have used) the cheaper versions will give similar benefits.  You need to find blackstrap molasses rather than traditional molasses.  The iron and calcium levels are much higher.  I found this is a nutrition store.

Sunday, September 16, 2012

Raspberry Banana Bread

I was trying to come up with something a little different for a fall bread.  I've been making banana bread and zucchini bread the last couple weeks.  Then I got to thinking this morning that Raspberry banana bread sounded yummy.  So here is how I made it!

Ingredients

2 ripe bananas, mashed
1 c. frozen raspberries
1/2 c. applesauce
2 eggs
1/3 c. almond milk
3/4 c. sugar
1 1/2 c. wheat flour
1 1/4 c white flour
1 tsp baking soda

Step 1. Preheat oven to 350 degrees.  Grease loaf pan.

Step 2. Combine eggs, applesauce, milk, and mashed bananas.  Stir well

Step 3. Add flours, sugar, and baking soda until moistened.  Fold in raspberries

Step 4. Pour batter into loaf pan and bake for 55-60 minutes, until a toothpick comes out clean

Serve and ENJOY!!!

The quest for milk

Cason, our youngest, is fast approaching 6 months old.  I was a very good mama and breastfed about 5 months (well, breast and bottle-fed him breastmilk).  I had already intended on stopping with the fresh milk at the end of August prior to my going back to work.  I started working for a different school district, which made that decision even easier due to the lack of space and challenges it would pose for me to be able to pump during the day. 

We had saved a freezer-full of breastmilk.  But it's amazing how quickly we seemed to be going through it now that the stock was not being replenished.  In order to extend the supply as long as we can, and in anticipation of the need to eventually resort to using formula, we began the quest to find a milk that Cason would like and his belly could tolerate.

First we tried Similac Advanced.  He seemed to like it, but we quickly noticed a change in his demeanor- extra crabby- and not sleeping as well. 

So then we tried the Similac Alimentum, the hypoallergenic formula.  He really didn't seem to like that one.  We had a difficult time getting him to eat more than a couple ounces at a time. 

I asked the doctor for suggestions at his 4 month check-up.  She said to try other brands.  But I protested that they don't offer a hypoallergenic formula.  Her reply was that "you don't need to go hyperallergenic, just try the stuff that is easier to digest."  Well, OK I thought, but this could get expensive.  Luckily she gave us samples of 2 Gerber versions- Soothe and Protect.  The ingredient list looked fairly similar to the Alimentum, so I opted to use that one.  He liked it!!  We used it for a couple weeks, but he began waking every hour or so (almost as bad as his older brother when he was little) and he seemed to be getting crabbier and crabbier during the day.  He also hadn't pooped in about a week.  If you know our kid, he regularly pooped 3-4 times a day and blew-out at least once or twice a week.  So I knew something was off (also I knew we experienced the same issue with our oldest).

So we stopped that formula and switched to only breastmilk for 2 days- low and behold he finally pooped (sorry for the poop sharing, but it's very important in the world of having babies) and had a much better nights sleep. After the 2 days, I decided we'd better go back to the Alimentum.  He seemed to eat it better this go around.  He definitely eats it better when it's warm rather than room temperature.  However, I'm still not sure his belly feels 100%, and he still isn't sleeping the best, but he isn't crabby during the day.

We know we need to be vigilant in finding him a formula that doesn't make him uncomfortable.  When his older brother was almost 1 we decided he probably has a milk intolerance, something I wish we would have figured out, or knew to consider when he was much younger- he may have been a much happier baby.  So here's to hoping the quest to finding a milk that works for him is quick and painless, because we are on a time crunch as the breastmilk supply quickly dwindles.